A DIY guide for professional product photography For your Web Site
by Alex Hudson on November 12th, 2014

When it comes to online consumer behaviour there really is no denying how gorgeous high-quality photography can act as a huge asset to businesses and increasing online transitions.
The good news for us is that creating these high quality images is easier than it has ever been. The progression in technology has enabled us to have constant access to cameras through our mobile phones, iPads and of course DSLRS.
You don’t need high end equipment to make good quality images. All you need are the five key elements.
- Camera
- Studio Setup
- Lighting
- Product Styling
- Post Production
From being an art student myself, I have made many DIY home studios. Fast approaching University deadlines meant that I sometimes had to do last minute alterations and improvise to complete or better an image. There is something really special about an image that you have one hundred percent created from start to finish and it looks exactly how you needed it too.
It is so easily done that I am going to share my step to step guide for a DIY product photography photo shoot.
Studios Space
First, we will need to set up our studio space. Find a space/room which will allow you enough room for a backdrop and allocate enough space around the product you wish to photograph.
For the backdrop a roll of white paper or a white sheet will work for a seamless professional look. A table and duct tape to hold the backdrop in place.
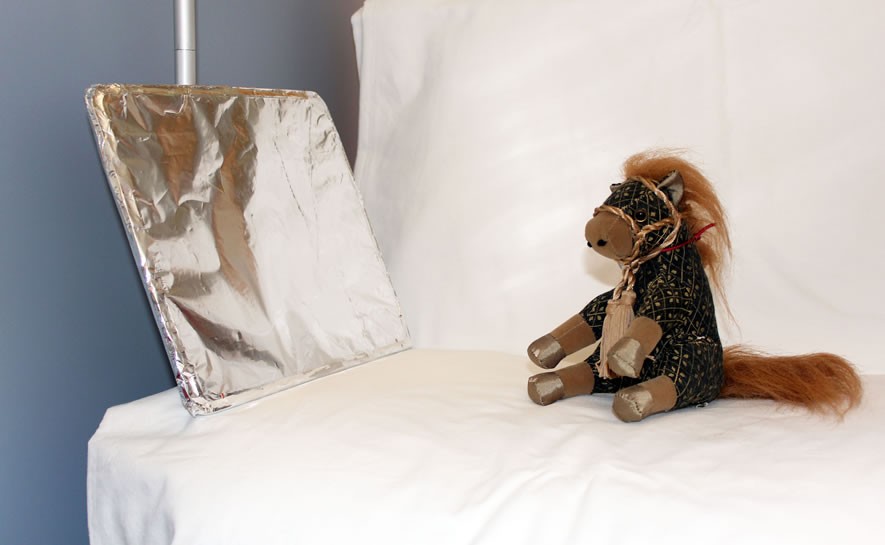
(For my photographs, I used a small corner of the room I had available. A chair, a white sheet and a home made light reflector just in case I needed it.)
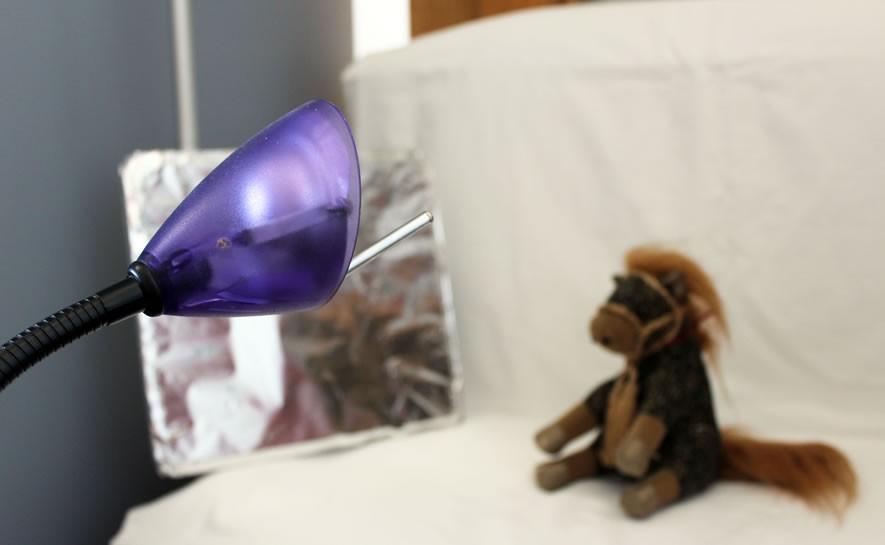
Lighting
Lighting is the key element in all photography. It is always the main influence in how good or bad your images will look. The other thing to remember with lighting is to not mix your light sources. Keeping to one particular type of lighting will help aid in achieving more realistic photographs.
There are different lighting techniques you can use for digital product photography such as, continuous lighting or flash. However, if like me and you are on a budget take advantage of natural light or your bedside lamp can always come in handy. (Daylight bulb)
Styling
Styling your product before you take the photographs will save you time and help create more flawless realistic photographs. I would recommend that you prepare your product thoroughly before you begin to photograph it. Repair any imperfections, remove dust, eliminate any wrinkles or creases and finally show your product off. Make sure that you show the shape of your product off especially if it is apparell. Stuff, prop and position your product so that you make it ‘pop’ for your viewer and potential buyers.
Tip: Materials such as fishing wire, dental floss and wire can help hold your product in place.
Clothing (Apparel) is sometimes best placed on a mannequin using pins or clips to shape the product around the object. This will help give a truer reflection of how it will look on your buyer.
You want your viewer to see themselves in it and looking as marvellous as the photo.
Post Production
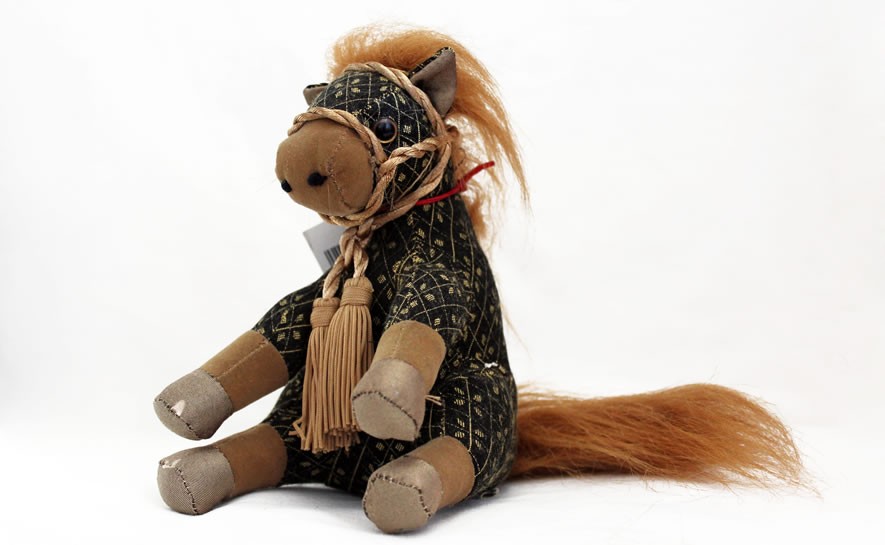
The post-production stage is my favorite step in the process, it is at this stage where you can bring your image to life and make those tweaks to make it really ‘pop’ and sell.
At this stage, you are better letting someone who knows what they are doing such as a graphic designer. At the very minimum make sure that the colours are accurate to the product if you are doing it yourself. You will be able to adjust these through Adobe Photoshop.
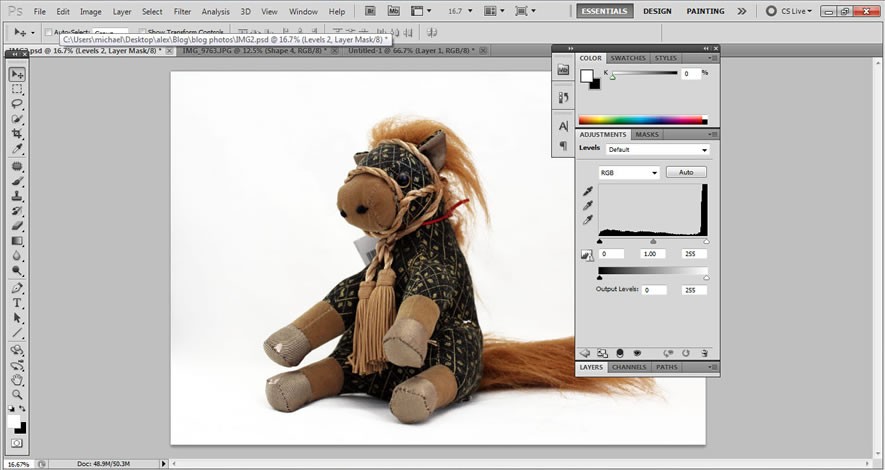
Tip: Consistency throughout your images will make a huge difference in the aesthetics and aid in presenting a professional feel. In doing this you will give your site a smooth clean feel and it will help make the site seem more user friendly and a lot more professional.
It is good to keep market place guidelines as something to refer to when taking your images in terms of margins and image size. (Especially if you want your product images to go on sites like Amazon and eBay.)
You should by now have your gorgeous product photography images or at least be well on your way to having your photographs.
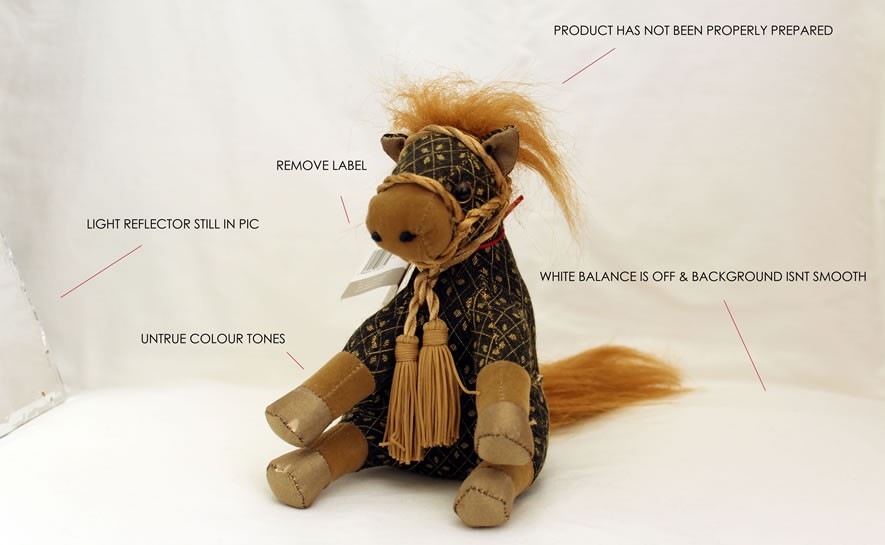
Just remember a camera with manual aperture and exposure teamed with a tripod in a space big enough to allow a backdrop and a large window will more than set you on your way to achieving those results you want as long as it does not look like the below image.


Get in touch
Got a project?
We would love to work with you to make your idea a reality. Start by completing our project planner. This will give us a better understanding of your needs and help us take the first step to creating something special.
Start Your Project Now ➞Alternatively call us on 02895 521 125